If you’re a beginner in the world of graphics and you’re eager to grasp the fundamentals, it’s highly recommended to engage in regular practice. If you happen to favor the Dev C++ Integrated Development Environment (IDE) for your coding endeavors, you’ll need to incorporate the graphics.h header file to empower the compiler to manage graphic-oriented tasks.
Incorporating the graphics.h library into Dev C++ is a straightforward undertaking. If you encounter any difficulties in the process of integrating the graphics header file into your Dev C++ compiler, this tutorial is designed to provide you with a comprehensive, step-by-step on how to add graphics in Dev C++.
Additionally, you can look into other modern libraries that are similar and better than graphics.h. To name a few –
- OpenGL
- DirectX
- SDL
- SFML
- Allegro
How to add graphics in dev C++ (follow these steps)
Step 1: Download/update the latest version of dev C++
Having the latest version of the dev c++ will ensure you have the latest features and avoid application bugs and security patches. It also ensures you face no issues while integrating the graphics with the compiler.
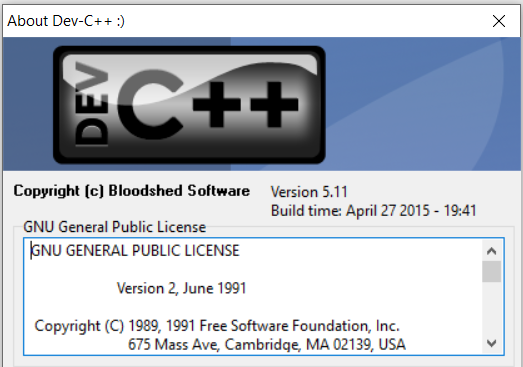
You can download the latest build of dev C++ which is obviously an open-source IDE. For this tutorial, I’m using the 5.11 version. You might get an upgrade, but the procedure should remain the same. To check your dev c++ version, select “help” from the top menu and go to the “About Dev C++” section.
Step 2: Add header source files into the Dev C++ directory
Next, you need to download graphics library files and add them to the appropriate folders under the MinGW64 directory. Follow this –
- First, download the header files from this Google drive link and extract the files.
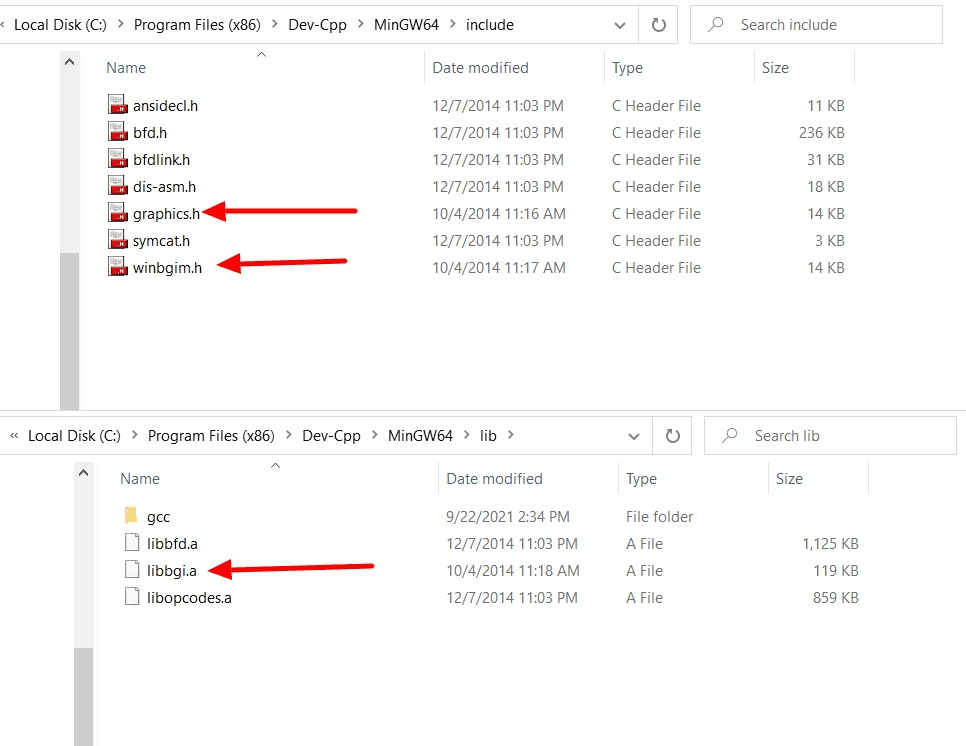
- It contains three files – graphics.h, winbgim.h and libbgi.a.
- You need to copy “graphics.h” and “winbgim.h” into
includethe directory of Dev-Cpp program resource files. The exact directory address is –C:\Program Files (x86)\Dev-Cpp\MinGW64\include
- Next, copy “libbgi.a” to the
libfolder, which should be inside MinGW64. The directory address is –C:\Program Files (x86)\Dev-Cpp\MinGW64\lib
Double-check the include and lib folders have these files to proceed to the next step.
Step 3: Change compiler suit in Dev C++
Compiler suites combine the latest stable release of the GCC toolset and open-source MinGW runtime APIs to build an open-source alternative to Microsoft’s compiler. You can set the TDM – GCC version to the latest stable release, which can be 12.1.0 [as of now].
- First, open the Dev C++ application.
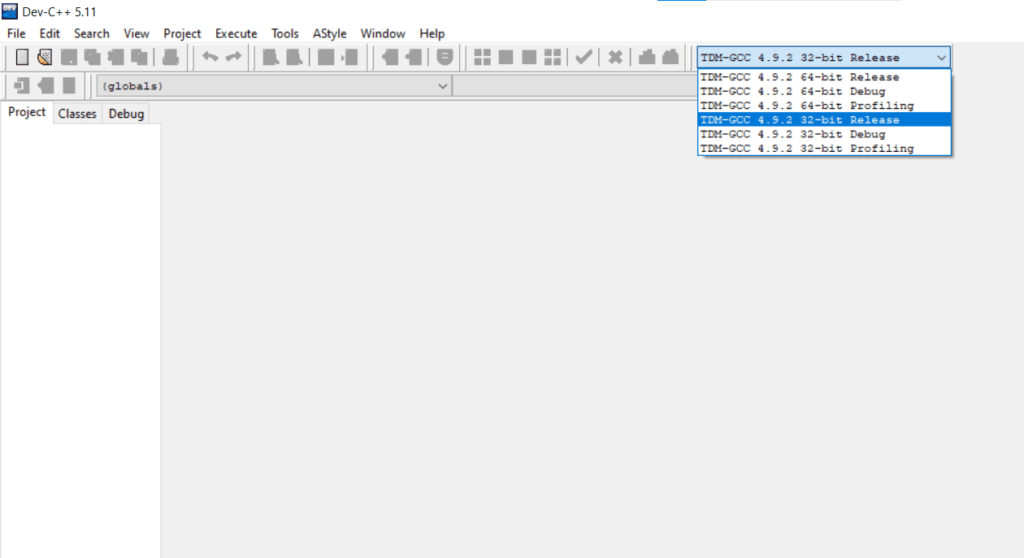
- On the right side of the toolbar, you will have the drop-down menu to select the desired compiler suit.
- Set it to the latest
TDM - GCC [version] 32-bit release.
Step 4: Configure required linkers for graphics
Configuring linkers is vital; this program will help link a program’s object modules into a single object file. For graphics.h setup, you will need these linkers to be set for the selected compiler suite, aka the latest TDM - GCC release.
Steps to configure graphics.h linkers:
- On Dev, C++, look for the Tool option on the top menu.
- Expand tools and select Compiler Options.
- You should arrive on the general tab of the compiler options window.
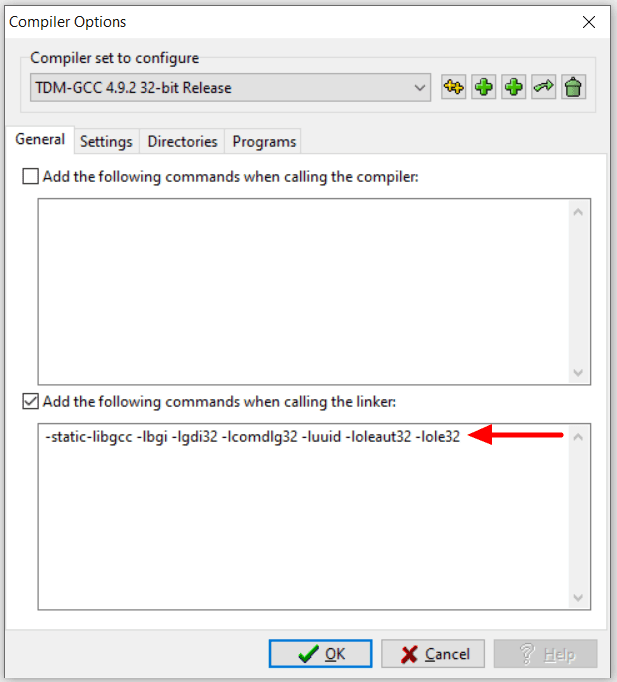
- Ensure the “Add the following commands when calling the linker” check box is selected.
- Then add these linkers in the input box – (copy and paste this line)
-libgcc -lbgi -lgdi32 -lcomdlg32 -luuid -loleaut32 -lole32
- Then click on OK to save.
When complete, you are ready to use graphics.h header in your c or c++ programs.
Step 5: Verify whether graphics.h header is working (optional)
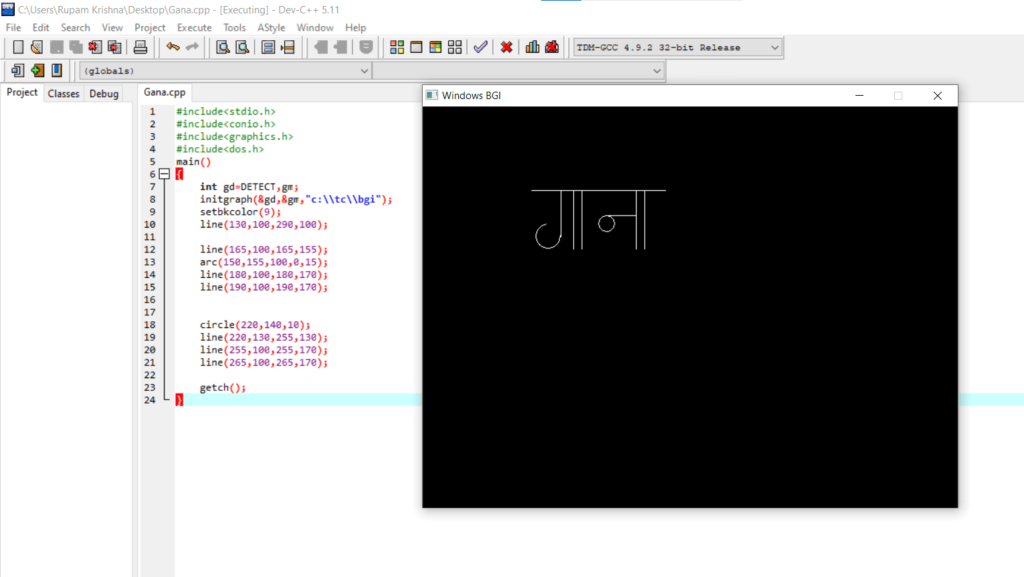
Create a new source file and write a program to test graphics.h header. You can try it with anything you want; for example, I’m trying to print GANA (in Hindi) using basic graphics output primitives…
#include<stdio.h>
#include<conio.h>
#include<graphics.h>
#include<dos.h>
main()
{
    int gd=DETECT,gm;
    initgraph(&gd,&gm,"c:\\tc\\bgi");
    setbkcolor(9);
    line(130,100,290,100);

    line(165,100,165,155);
    arc(150,155,100,0,15);
    line(180,100,180,170);
	line(190,100,190,170);

    circle(220,140,10);
    line(220,130,255,130);
    line(255,100,255,170);
    line(265,100,265,170);

    getch();
}
And here’s the output:
Still unable to add graphics in Dev C++?
Following these steps should set you up with graphics.h header on Dev C++. If it still doesn’t work, ensure you have followed the process thoroughly… or try to perform a clean installation of the Dev C++.
Then follow these steps again.
???? Similar Articles:

it doesnt work i havent got 4.9.2 on the latest release. it is now 9.2.0,,,oh well yet another fail.
I followed all the steps exactly as mentioned by the author. I am using Embarcadero Dev C++ version for developing C and cpp apps.
One thing author forgot to mention in his TEST SOURCE CODE is
where it is written c:\\tc\\bgi use your PATH for TC (TurboC).
In my case it was H:\\tc\\bgi.
One important thing to remember that “Add the following options to linker step”
Make sure you don’t add -libgcc option twice.
As i have that option -libgcc already in that linker box and when I copy pasted the author’s line of options, i accidentally doubled -libgcc option.
That’s all. Very thankful and grateful to the author.
thank you, the information was really helpfull.