Connection issues are still a common problem in Windows 10 & 11. A reliable network connection is necessary when carrying out online tasks smoothly. Experiencing frequent disconnections from WiFi on your laptop can be frustrating.
Typically, a laptop might lose its WiFi connection because it goes out of range, enters sleep mode, or experiences power profile issues when the battery is low. However, if it repeatedly disconnects without these usual explanations, it can seriously disrupt your online activities.
The preliminary reasons for a laptop to constantly get disconnected from a WiFi network could be a weak signal, incorrect network configuration, adapter power settings, incorrect or outdated drivers as well as hardware issues.
Thankfully, resolving the problem of your laptop disconnecting from WiFi is straightforward. Let’s explore some effective solutions.
How to Fix Laptop Keeps Disconnecting From WiFi Issue?
Before troubleshooting, attempt connecting your laptop to a different Wi-Fi network. If it remains unstable on any network, it could indicate a need for your Laptop’s network card driver update or hardware fix, potentially saving you troubleshooting efforts.
1. Restart your laptop and router
When addressing the issue of your laptop’s ongoing disconnection from WiFi, you should consider deleting the Wi-Fi network from your list of known networks and then restart both the laptop and the router.
A fresh start will effectively reset the connection and network settings, potentially resolving the issue.
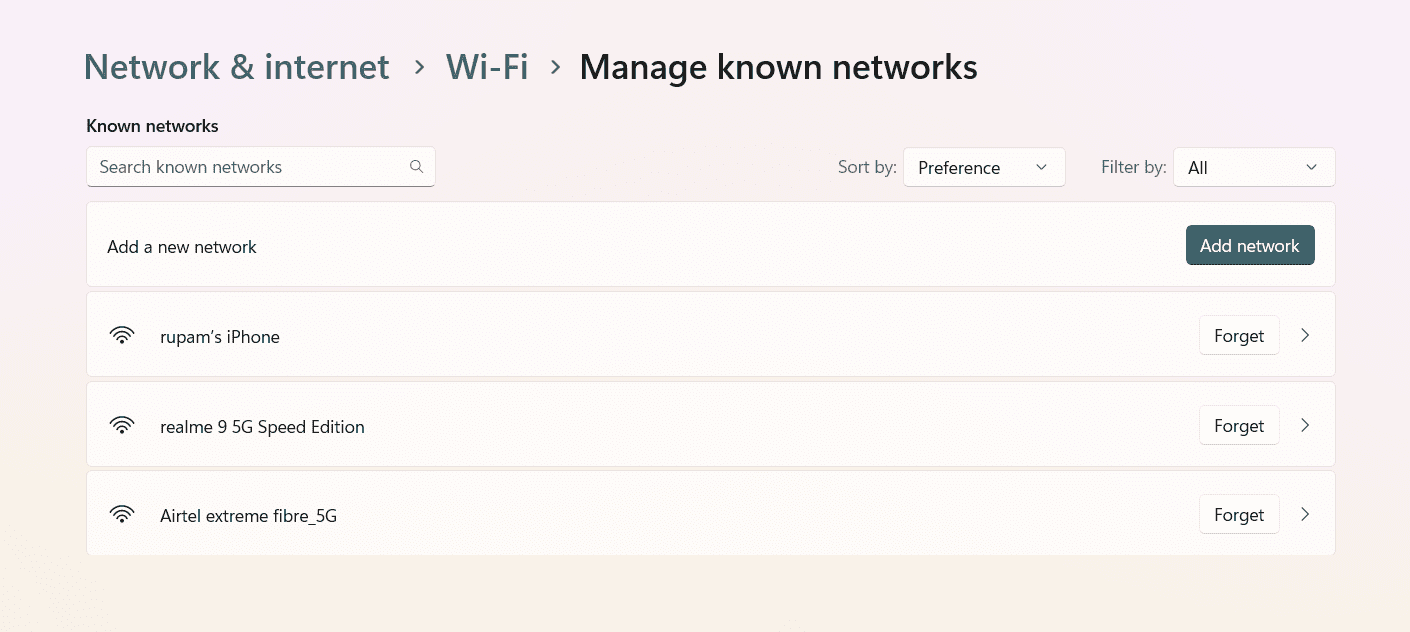
- Go to Settings > Network & Internet > Wi-Fi > Manage Known Networks.
- Remove the network you are having trouble with.
- Then turn off the router or modem, and unplug the power cable.
- Also, shut down the laptop and disconnect the power cable.
- Wait for a couple of seconds (preferably a minute) before plunging in the power cables.
- Power on your router and switch on your laptop.
Once both devices are up and running, try reconnecting to the network and see if that disconnection issue persists.
2. Troubleshoot the wireless network
The Windows Troubleshooter is another useful tool at your disposal for identifying Wi-Fi connection problems. There’s a possibility that the troubleshooter will detect any unnoticed issues and guide you in resolving them.
- Search for “troubleshoot settings” in Windows.
- Open it.
- Then click on the “Additional troubleshooter” link (Windows 11 users go for other troubleshooters)
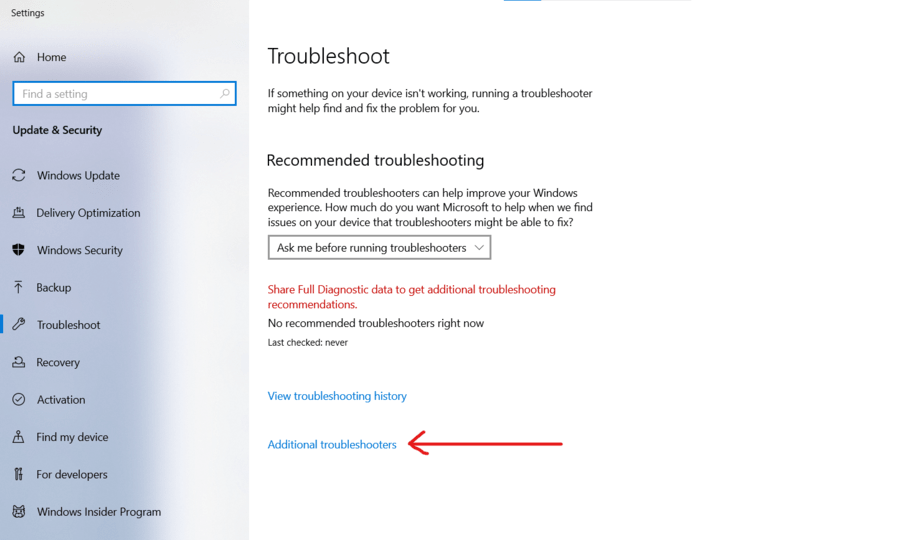
- Next, click on Internet Connections to start troubleshooting.
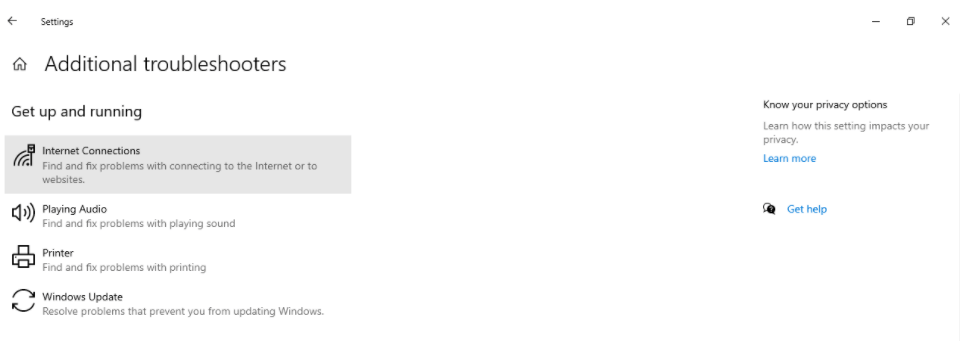
If the troubleshooter successfully identifies the issue and provides a quick solution, consider giving it a go. Test whether it effectively resolves the ongoing wireless network disconnection problems.
If not, you should turn off the power saver option on your wireless LAN card.
3. Turn OFF network adapter’s power-saving Mode
While Windows’ power-saving strategy is beneficial for conserving energy, it may disable the network adapter to save power, potentially leading to an unreliable Wi-Fi connection.
To prevent the computer from disabling the network adapter for power-saving purposes, you should disable the corresponding settings.
- Press the Windows + R keys to start the RUN box.
- Type ncpa.cpl and click on OK to start the network connection window.
- Right-click on your Wi-Fi connection and select properties.
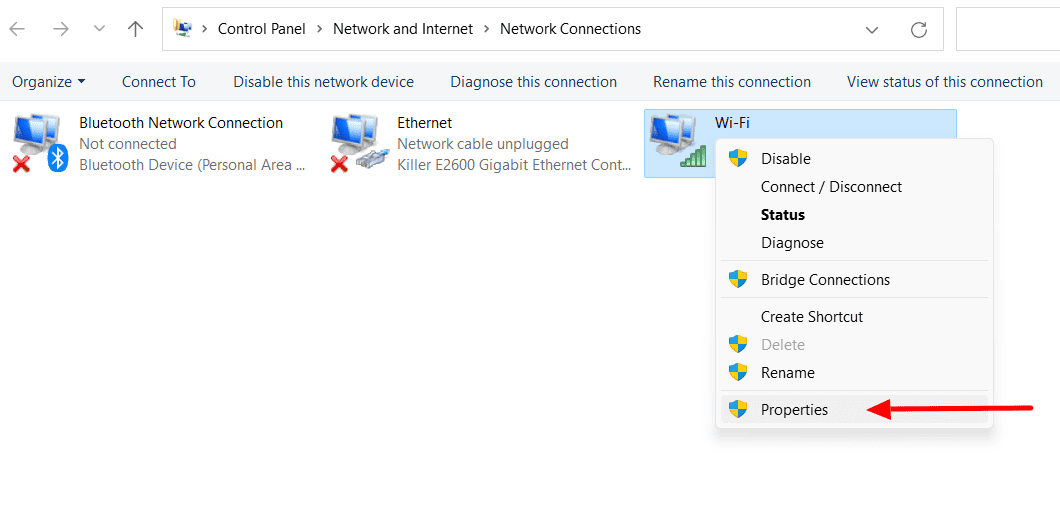
- Click on Configure in the popup window.
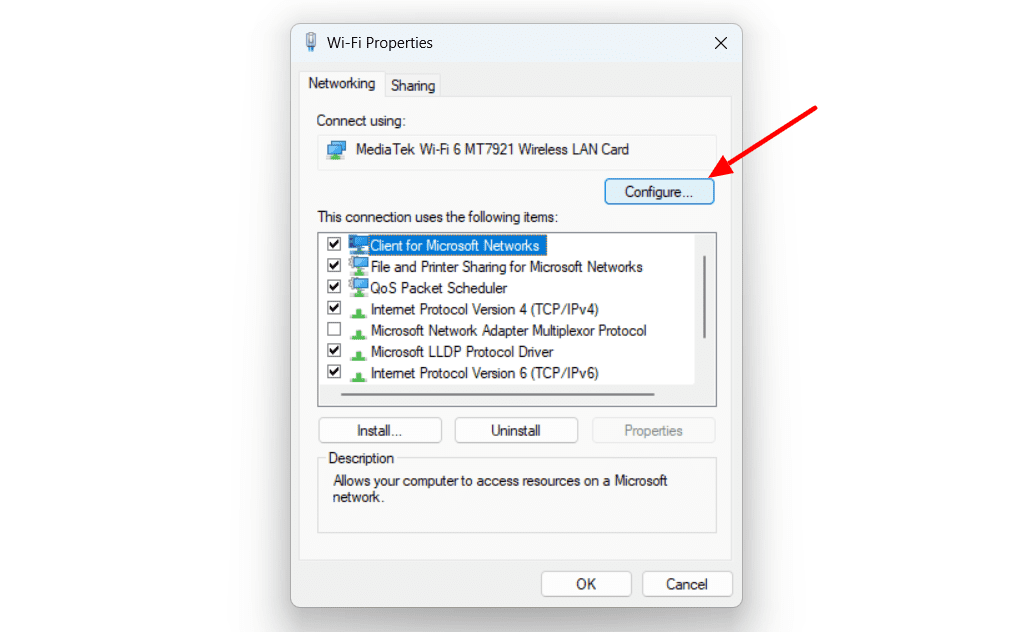
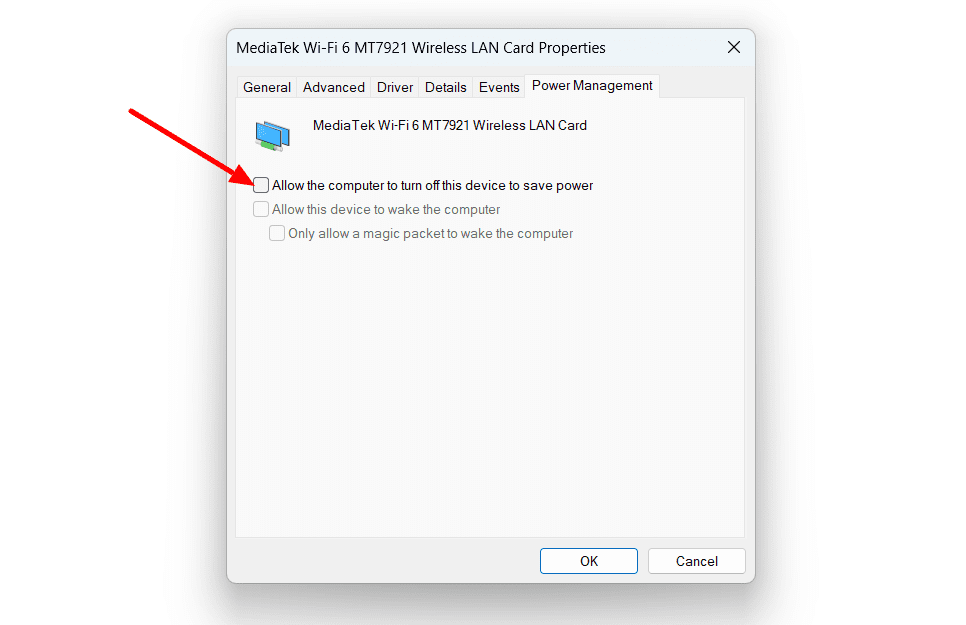
- In the next window, switch to the power management tab and uncheck the “allow computer to turn off this device to save power” option.
This video explains this process really well, so you may want to have a look at the steps.
After configuring the setting, reconnect your laptop to the Wi-Fi network and see whether this resolves the issue of your laptop repeatedly disconnecting from Wi-Fi.
4. Reinstall/update network drivers
Reinstalling and updating the network driver can potentially fix an unstable Wi-Fi connection. You can update or reinstall this driver via the device manager.
- Press the Windows + X keys and open the device manager from the list.
- Expand network adapters.
- Right-click on your wireless network driver and select uninstall the device.
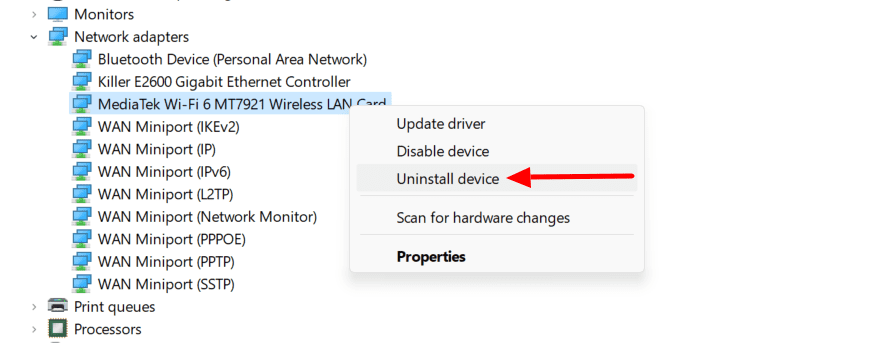
- Then restart your laptop for the driver to be automatically reinstalled.
Following the restart, make an attempt to connect to the Wi-Fi network and observe whether your laptop can maintain the connection without any interruptions.
5. Disable 802.11n Mode
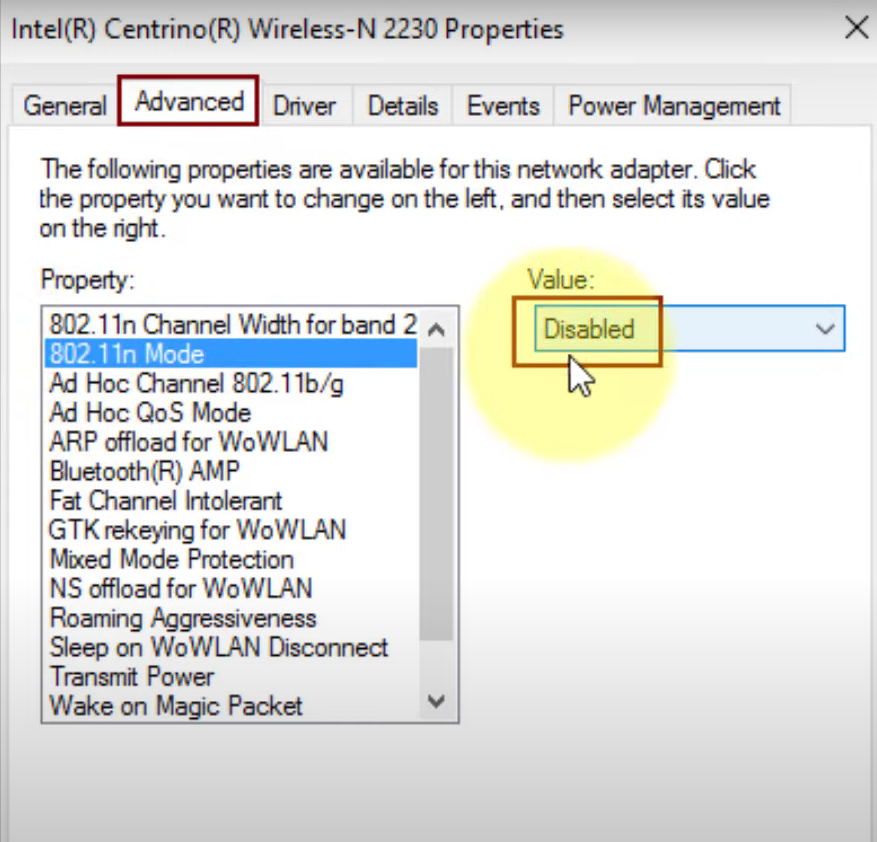
The 802.11n on your wireless adapter offers faster data transfer speeds but can be more susceptible to interference. Older devices may not support it, so disabling 802.11n can help them connect to your network and potentially fix the laptop keeps disconnecting from WiFi issue.
- Press Windows + R and type ncpa.cpl.
- Select your Wi-Fi network and right-click to open property windows.
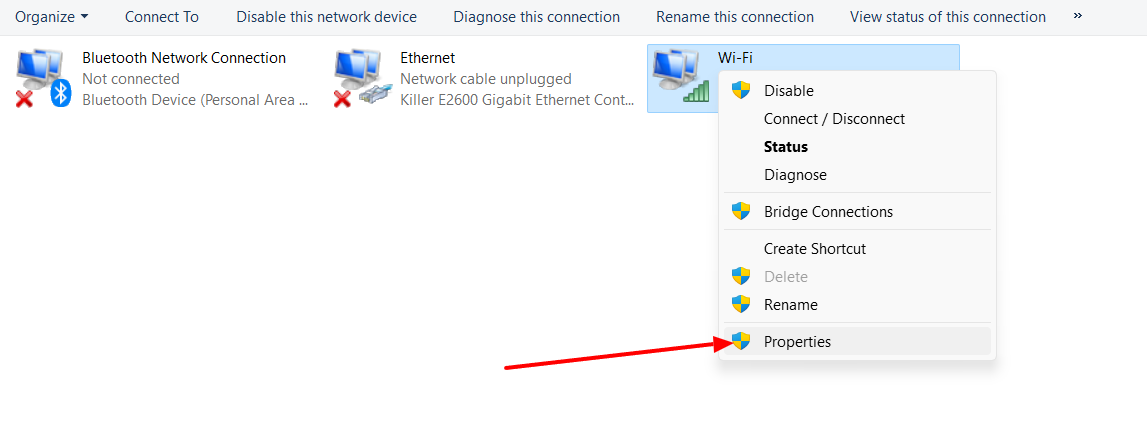
- Click on the Configure button on the property window.
- Then switch to the Advanced tab.
- Under the property list, look for 802.11n mode.
- If you can find it, choose disabled and click on OK.
6. Configure Startup property of the WLAN service
A WLAN service profile configures wireless connections, and your PC needs at least one active service instance for proper operation.
If the WLAN AutoConfig service fails to start with your PC startup, your wireless connection may get interrupted.
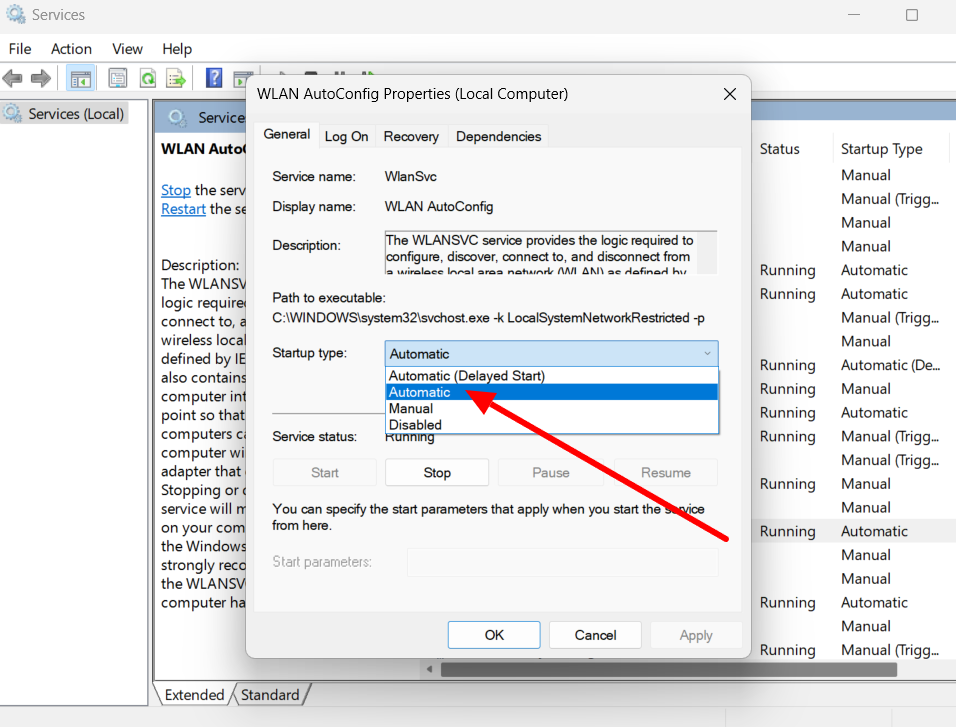
- Press Windows + R then type services.msc and click OK.
- Scroll to find WLAN Autoconfig.

- Right-click and go to Properties.
- Select Startup type to Automatic and click OK.
After this change, recheck your Wi-Fi connection status.
You may also like | How to fix Razer Synapse not opening on Windows
7. Reset Network Socket and IP
Restoring TCP/IP settings to default can help fix laptop disconnecting from WiFi problems, but note that it resets all Network & Internet settings, including Wi-Fi, Bluetooth, VPN, and more. The EaseUS data backup is a great utility to use in such circumstances and ensures your important settings and files are safe.
- Open the Windows command prompt with admin privilege.
- Run these two commands:
netsh winsock resetnetsh int IP reset resetlog.txt
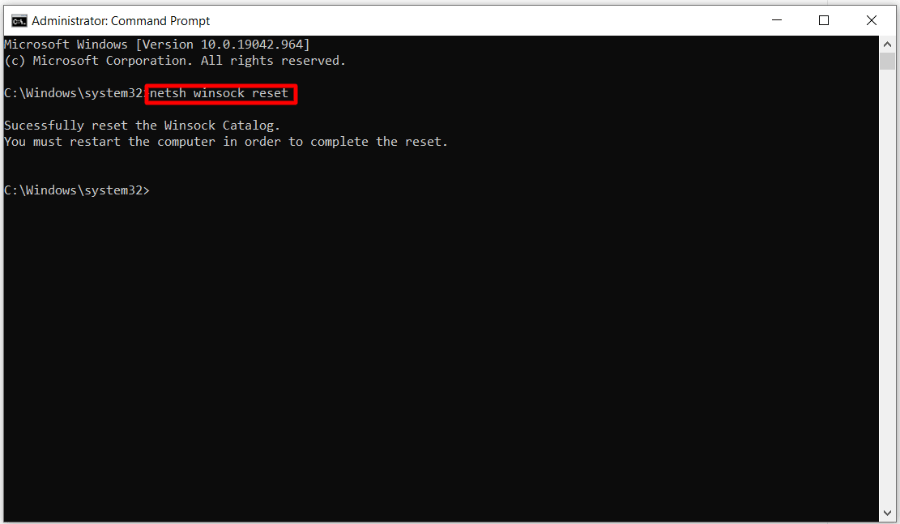
Then restart your laptop.
8. Switch Network profile
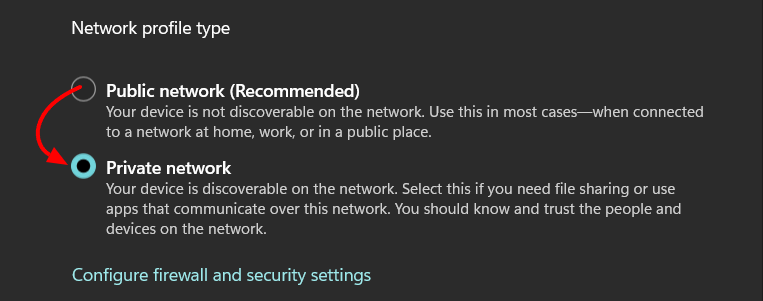
Several users have reported that their laptop’s frequent Wi-Fi disconnection issues were resolved when they switched the network from “Public” to “Private.”
- Click on the Wi-Fi icon on the taskbar.
- On the desired Wi-Fi network right-click and select properties.
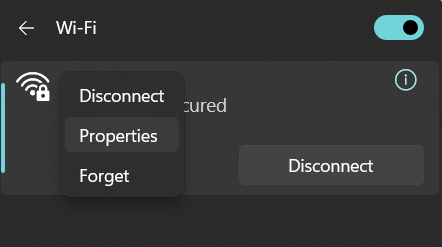
- Under network profile type, switch to private network it’s set to public network.
9. Check for hardware ISSUES
A malfunctioning router or modem can cause random laptop Wi-Fi disconnects. You can test it by connecting to a different Wi-Fi network; if it’s stable, your router may be the issue. If restarting the router doesn’t work, you should seek professional help.
The laptop’s network card could also be a problem, in that case, you can consult professionals or communicate with the the company service.
10. Disable Wi-Fi Sense
Windows 11 no longer includes Wi-Fi Sense, a feature removed due to security concerns. This feature is also absent in the 2021 update of Windows 10’s version 1803.
If you are running on an older Windows version with Wi-Fi Sense, frequent disconnections may occur as your laptop switches networks. Wi-Fi Sense connects to open hotspots and shared networks from contacts, potentially causing disruptions.
To disable Wi-Fi sense:
- Go to Windows settings and click on Network & Internet.
- Then, go to Wi-Fi and click on the Manage Wi-Fi settings.
- Scroll to Wi-Fi Sense and turn off Connect to networks shared by my contacts.
- Then restart your PC.
You can also disable Wi-Fi Sense using the registry editor.
If none of the previous methods proved effective, it’s advisable to contact the manufacturers of your laptop and router for further assistance.
Similar Articles:
