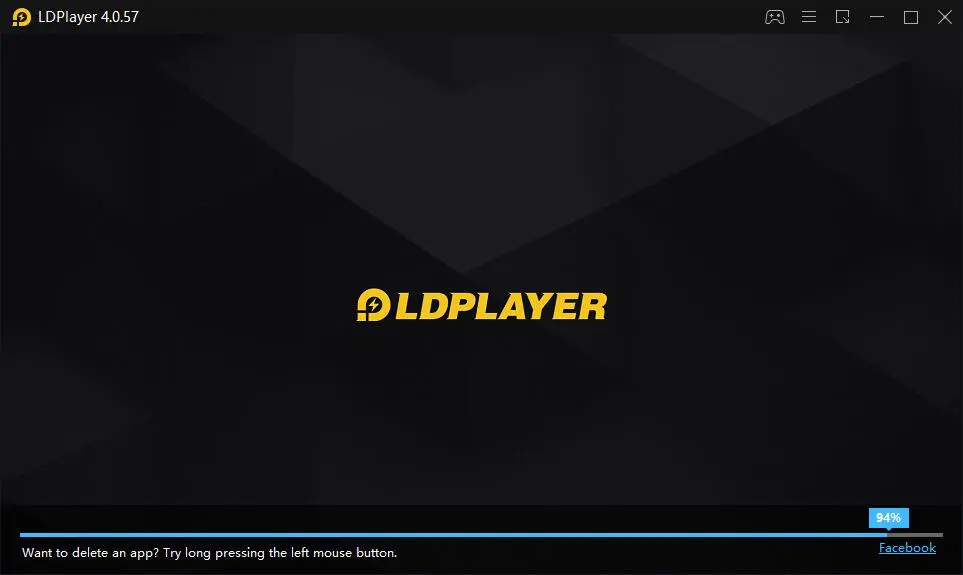
If you use the LDplayer android emulator, there is a possibility you might be struggling with LDplayer not starting problem. The virtual box stuck loading at 50% or 94% and there is no going forward. This can be annoying because the emulator won’t start at all.
Many people who use the LDplayer have encountered the application starting issue when virtualization is enabled. When your virtualization technology is disabled, it works perfectly, but disabled virtualization reduces the performance of LDplayer, especially if you are gaming & multitasking on the emulator.
So in this post, you will find solutions to resolve the LDplayer not starting issue and use the emulator again.
Before you start, re-install LDPlayer from the official page and check whether the issue persists. If the problem remains, proceed with the following steps.
What is LDPlayer?
LDPlayer is a free android emulator created by a Chinese company based n Hongkong called XUANZHI INTERNATIONAL CO. LIMITED. It is an excellent alternative to popular android emulators.
Reasons behind LDplayer not starting issue
There are more than one specific reasons why LDplayer may fail to load. Here are some common reasons for you to encounter the LDplayer not loading issue.
- One of the primary reasons for LDplayer loading failure could be missing core files.
- Incompatibility between the Android emulator and computer OS can trigger LDplayer loading failure.
- LDplayer starting issue might occur due to incompatible configuration of virtualization technology.
- LDplayer stops loading at 50% is often caused by a graphics driver issue.
Here are the ways you can try to fix LDplayer starting issue.
How to fix LDplayer not starting issue
1. Recreate LDpayer instance
When you encounter LDplayer loading issue one of the best way to fix it by recreating a new LD player instance.
Recreating the virtual box instance will initiate a brand new program of the emulator. It will fix application cache related issues. LDplayer has a tool to create a new instance; follow these steps –
- Open LDMultiplayer on your PC.
- Click on the “New/Clone” button in the right-bottom corner.
- Then click on the “New player” icon on the left side.
It will initiate a new LDplayer instance. Click on “Start” to launch the newly created instance. Later, you can delete the previous/original LDplayer instance.
![4 best ways to fix LDplayer not starting error [Tutorial] 1 ldplayer-instance-1](https://gamespec.tech/wp-content/uploads/2021/05/ldplayer-instance-1.jpg.webp)
- Click on New/Clone.
- Click on New Player.
- Start the new instance / Delete the old.
2. Enable Virtualization & Disable Hyper -V
Enabling virtualization allows LDplayer to get more computer resources to provide smoothness to the running application. LDPlayer launching error issues can be caused by disabled virtualization too. The emulator itself recommends you enable virtualization for maximum efficiency.
2.1 – Confirm your PC supports virtualization
Not all PC supports virtualization. You need to confirm whether your PC supports virtualization or not. To check this, first download the LeoMoon CPU-V application and run the .exe file once the downloading is complete. Depending on your PC capability, you will see the result like this:
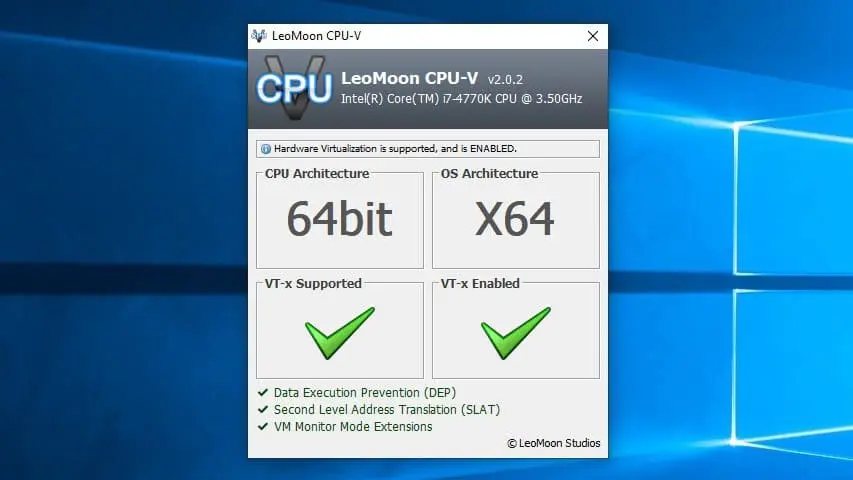
If your PC does not support virtualization technology, that’s not a piece of good news, and you can’t proceed to these steps to fix the emulator launching error. However, if the LeoMoon application says the VT is supported but not yet enabled, you can enable it in PC BIOS.
If VT is already enabled, then skip the BIOS settings part in this post.
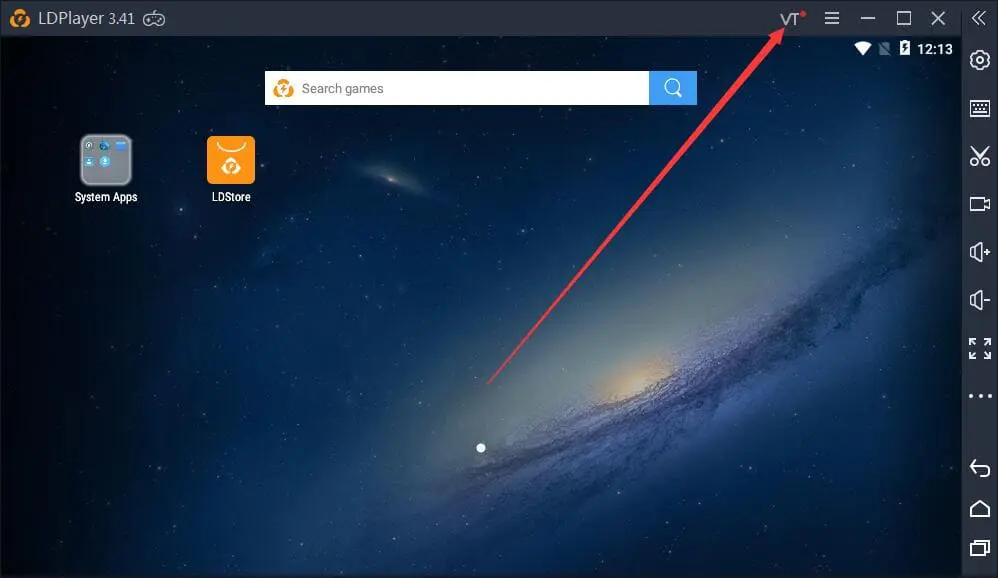
Note: There are two more ways to check whether VT is enabled or not. You can look at the top of your LDplayer and there should be a VT icon that indicates VT is disabled. Once the VT is enabled, the icon will automatically disappear.
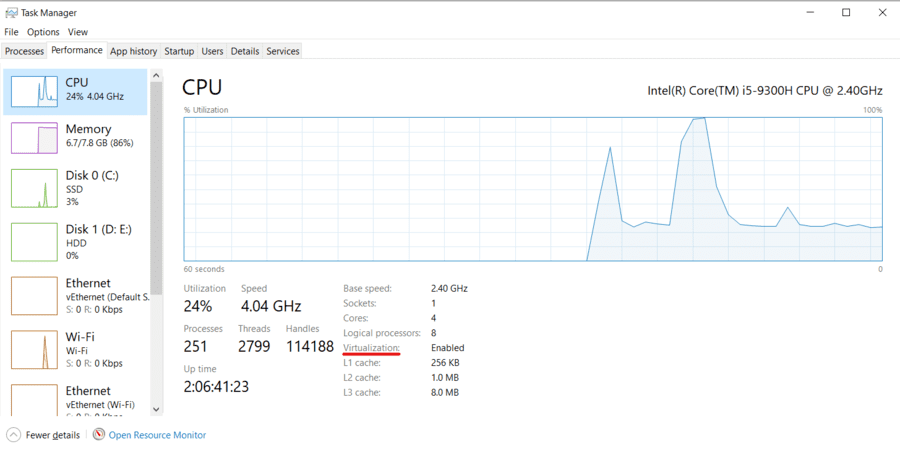
Another way to check whether virtualization is enabled or not is by opening the task manager and selecting the performance tab. On the right panel, you will see the status for virtualization declaring either enabled or disabled.
2.2 – Enable virtualization is BIOS
Enabling virtualization in BIOS is an entirely manual process because windows OS won’t be running at that time. The steps are as follows;
- Restart your computer. (Press F2 or Del repeatedly key as soon as the PC shuts down)
- If that does not take you to the BIOS panel, then try pressing another key. Every brand of laptop and desktop has a different BIOS entry key for example, F9 for HP but F12 for Acer. You can Google your laptop/desktop’s BIOS entry key or check this image.
- After you enter the BIOS menu, use the direction keys (←, →, ↑ or ↓) to switch between the available settings and tabs. Find the virtualization setting and enable it. I should appear as Intel (R) Virtualization Technology. If not, look for the virtualization, and VT keywords.
- Finally, press the F10 key to save the setting and exit the BIOS. This is important because if you do not save the setting, virtualization won’t work for you.
2.3 – Virtualization enabled at BIOS, but LDPlayer doesn’t detect
Even if you enabled the virtualization technology, you might still end up facing LDplayer not starting problem. Typically this happens in Windows 10 operating system, and you need to disable the Hyper-V manager.
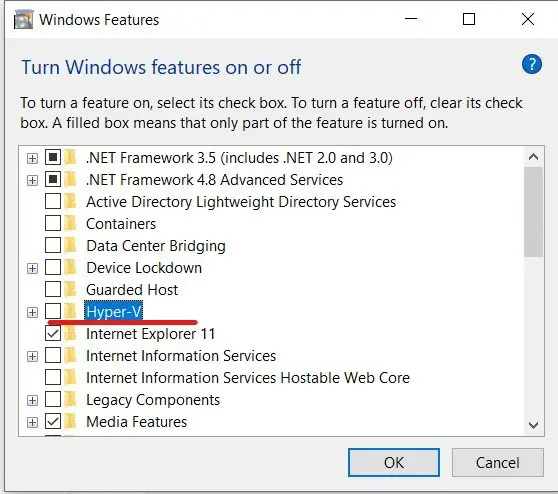
You can disable Hyper-V using the turn-off/on windows feature program or with the help of the command prompt with administrator privilege.
Turn off Hyper-V using the windows feature window
- Search for windows features in the Windows search box.
- Select the “Turn Windows features on/off” program.
- Uncheck Hyper-V from the list.
- And restart your PC.
Turn off Hyper-V using CMD with admin privilege
- Make sure you have enabled virtualization in BIOS.
- Start your command prompt as administrator.
- Type
bcdeditin the cmd. - At the bottom, look at the status of hypervisorlaunchtype.
- If the status is auto or enabled, you should disable it.
- To disable type:
bcdedit /set hypervisorlaunchtype offon your cmd. - Then restart your operating system & it should fix this Ldplayer not starting issue.
For more command, prompt-related articles, check these; “How to remove virus using cmd” & “How to clean computer using cmd“.
Additional info: The Hyper-V Manager is enabled by Docker means Docker runs on top of hyper-v, so you can fix this issue by removing the Docker as well. Check this guide on uninstalling docker and cleaning docker data.
3. Turn off the core isolation
In fact, I have read many guides suggesting disabling anti-virus programs as they may hinder the running process of LDplayer. While this might be true for 3rd party antivirus such as Avast, however, if you have the default windows defender protecting your PC you need to disable the core isolation feature.
I noticed when the core isolation is enabled, it turns off the virtualization technology even if it was enabled in the BIOS. You can disable core isolation with these steps:
- Open windows security center.
- Go to device security on the left panel.
- Click on core isolation details.
- Now disable memory integrity.
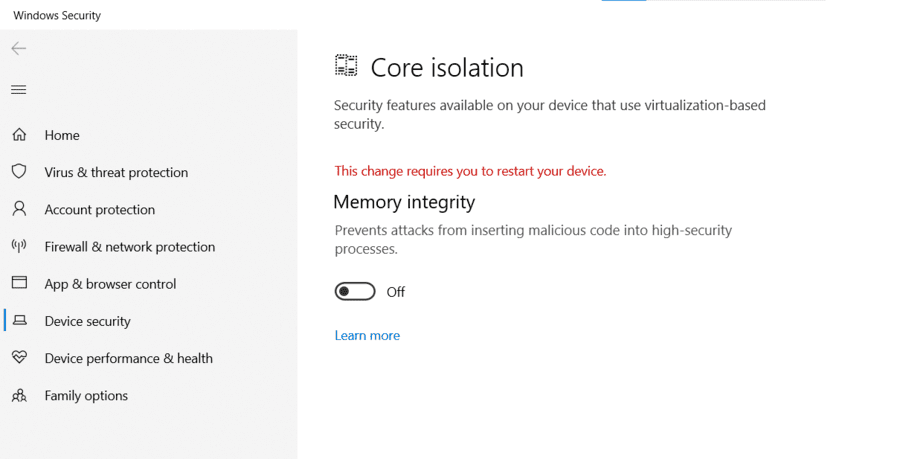
After this, make sure to check LDplayer loading status. If it doesn’t help, move on to the next step.
Note: If you have additional anti-virus installed on your PC, try uninstalling them. It may help in fixing this LDplayer not starting issue.
4. Update your graphics card driver
A fault in the graphics driver can prevent LDplayer from starting. It can be either an incompatibility issue, or you might need to update your graphics driver. If the emulator has stopped loading, you can get diagnostic information on the top-right menu of the emulator window.
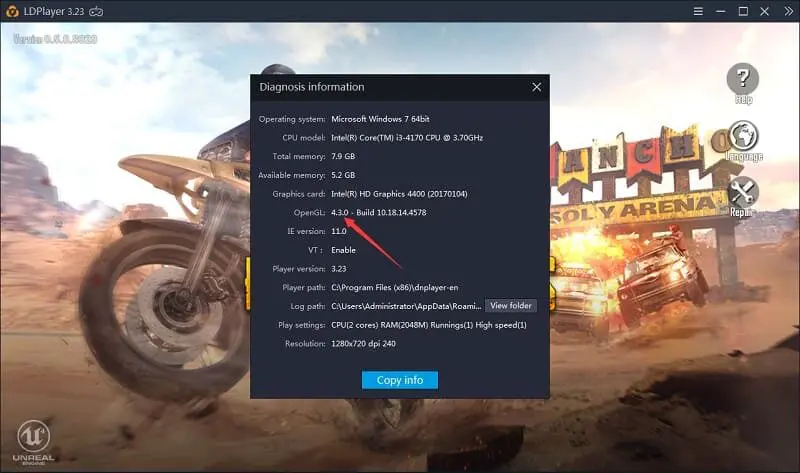
If the info about openGL indicates as either 1.1.0 version or blank, then it means that you may have some issue with graphics driver compatibility and should update to fix the issue.
You can update the graphics driver using windows device manager or GeForce experience (for Nvidia graphics card) & through windows update for AMD Radeon GPU. Updating graphics drivers using the device manager is very simple.
- Open device manager.
- Look for display adapters.
- Select your graphics card from the available adapters.
- Right-click and select “update driver.”
- Windows will automatically search for the driver and install it if it finds an available update.
To update/download the Nvidia graphics driver with the GeForce experience application, click on the link. For AMD Radeon graphics card, you can either follow the device manager way or download AMD’s official auto-detect tool.
Once your graphics card update/reinstall is complete, verify whether it solved the LDPlayer not starting issue.
Wrapping up:
LDplayer is a great emulator for android gaming on your PC. This startup error can be very annoying when you are trying to have a good time playing games like PUBG, Call of duty, etc. I hope these four steps help you find a way out of this mess.
???? Similar Articles:
